Mmm, made from scratch apple pie. You're not an American if you haven't baked or eaten apple pie at least once in your life. And if you haven't ever thrown a pie/shoved someone's face in it/accidentally dropped a pie on a sidewalk on the way to a neighbor's pool party, you haven't had a childhood, either.
So back to the real, good, made-from-scratch apple pie. You're going to need pie crust (recipe here) along with a couple other ingredients, namely, eight apples.
They can be apples of any color/variety. I've done Granny Smith before and this one uses Golden apples, which were the only ones available in French springtime. This is a great recipe to use for Thanksgiving, but why not make it for Easter as well?
Ingredients:
8 apples
1/2 cup white sugar
1/2 cup brown sugar
1/2 cup vegan butter
1/4 cup water
3 tablespoons flour
Pie crust
#1. Do the pie crust. It takes a while. When you're done, separate the dough in two (a slightly bigger dough for the crust, and a smaller one for the lattice work on top).
#2. Peel, core, and slice the apples thinly.
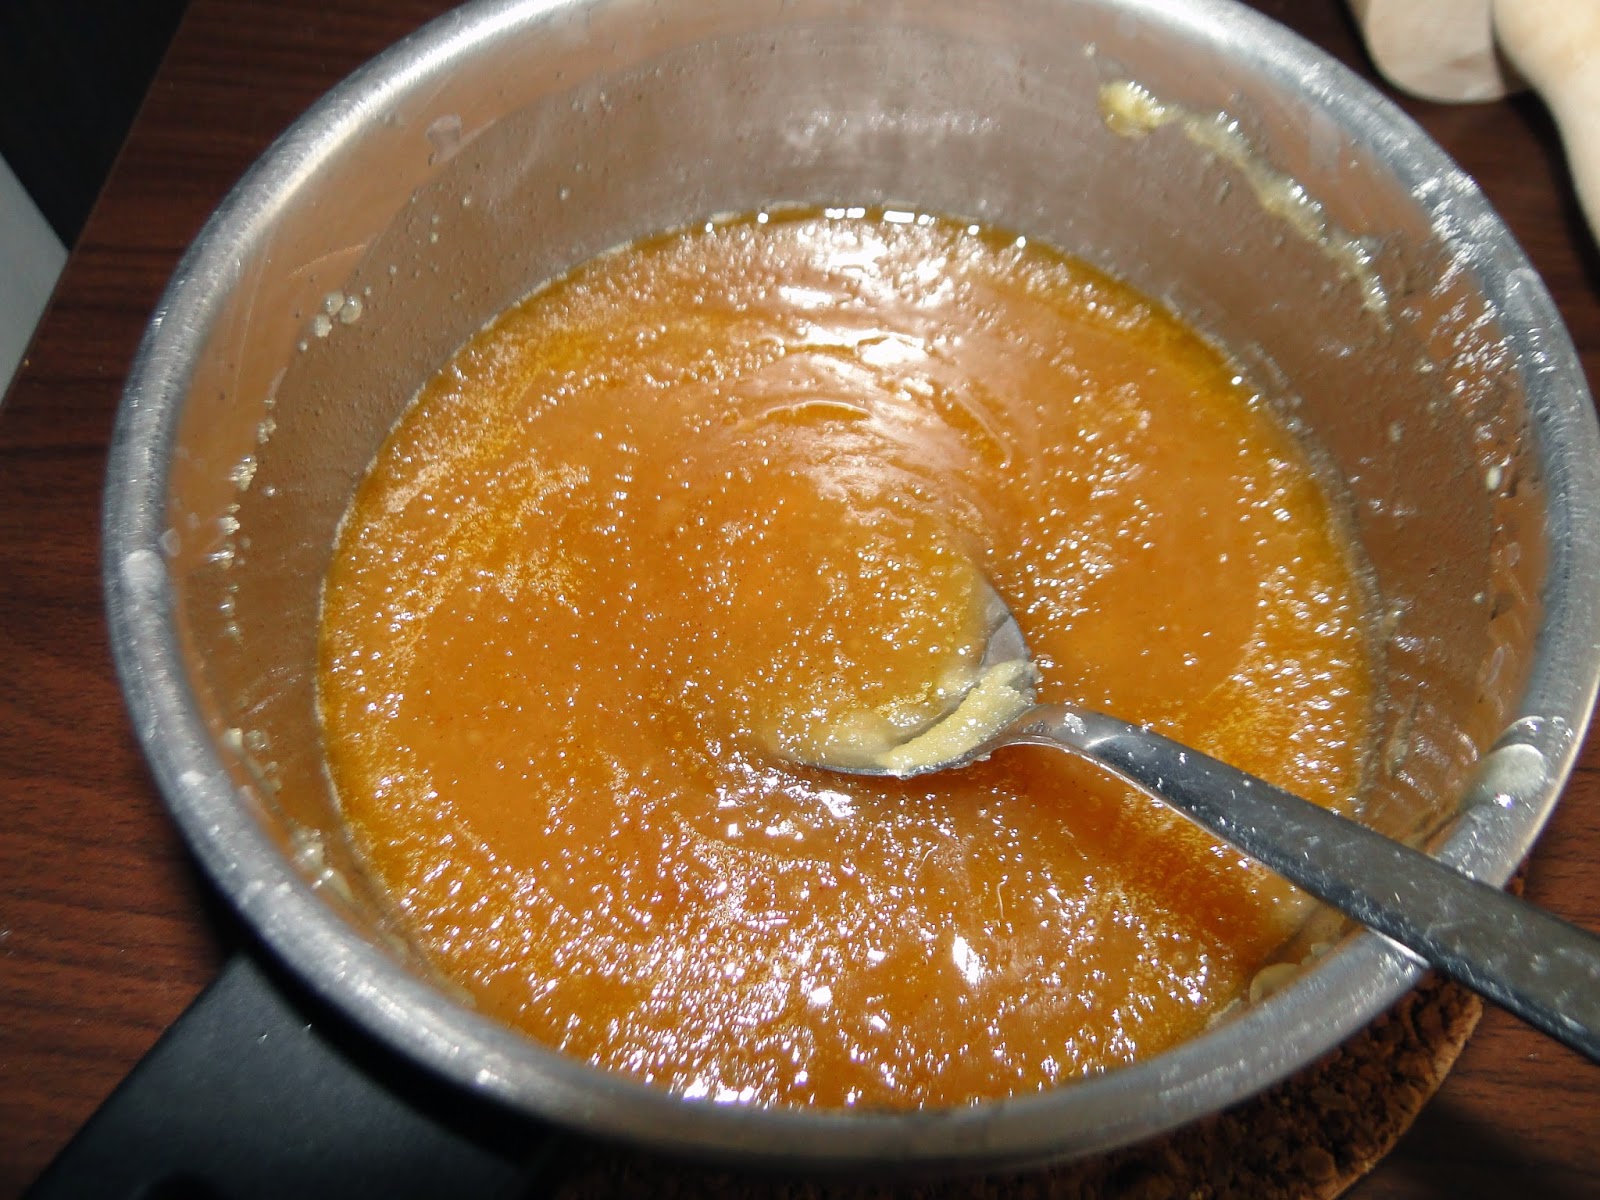
#3. Melt the butter in a saucepan, and add the flour. Stir until combined, and add the water.
#4. Add the sugar a little bit at a time, and bring to a boil. Then, reduce the heat and let simmer. The sauce needs to be slightly liquid.
#5. Arrange the sliced apples inside the pie crust in neat circles, packing the slices together.
#6. Preheat the oven, then cover the pie with a lattice work. If you don't know how to do it, watch the friendly video below.
#7. Pour the sauce on top for a crunchy sugary touch.
#8. Bake for 40 minutes at 180°C. Enjoy!
Affichage des articles dont le libellé est recipe. Afficher tous les articles
mardi 22 avril 2014
jeudi 10 avril 2014
Vegan pot pie
Now, what does one do when there are fresh zucchini, asperagus, and carrots in the refrigerator?
Vegan pot pie, of course!
I came upon this recipe by chance and adapted it to whatever I had in my refrigerator. I used these vegetables right here :)
Ingredients for the filling:
One large zucchini
A carrot
A can of corn
Half of a leek
Chickpeas (quantity is up to you)
Three asparagii
1 onion
2 cups vegetable broth
Bay leaf
1/4 cup flour
1/4 non-dairy milk
1 tsp. Paprika
1 tsp. Thym
2 tablespoon vegan butter
And you'll also need pie crust. Check out the recipe for pie crust here.
Steps
1. Make the vegetable broth and let the bay leaf simmer in it for about 5 minutes.
1. In a seperate pot, sauté the onion in the butter for 10 minutes, until soft.
2. Add paprika, thym, and flour. Stir until combined, and cook for 5 minutes.
3. Add milk.
4. Add the vegetable broth and take the bay leaf out. Add remaining ingredients, except for the asparagi (I added them on top of the pie, at the end).
5. Bring to a boil, then lower the heat, and cook for 10 minutes. It should look bubbly and sort of creamy. Pre heat your oven for 15 minutes at 180°C.
6. Place inside pie crust and decorate with asparagi.
7. Cover the pie crust and make a few holes in the top with a knife. Bake for 20 minutes.
A slice of vegan pot pie when it's finished:
Vegan pot pie, of course!
I came upon this recipe by chance and adapted it to whatever I had in my refrigerator. I used these vegetables right here :)
Ingredients for the filling:
One large zucchini
A carrot
A can of corn
Half of a leek
Chickpeas (quantity is up to you)
Three asparagii
1 onion
2 cups vegetable broth
Bay leaf
1/4 cup flour
1/4 non-dairy milk
1 tsp. Paprika
1 tsp. Thym
2 tablespoon vegan butter
And you'll also need pie crust. Check out the recipe for pie crust here.
Steps
1. Make the vegetable broth and let the bay leaf simmer in it for about 5 minutes.
1. In a seperate pot, sauté the onion in the butter for 10 minutes, until soft.
2. Add paprika, thym, and flour. Stir until combined, and cook for 5 minutes.
3. Add milk.
4. Add the vegetable broth and take the bay leaf out. Add remaining ingredients, except for the asparagi (I added them on top of the pie, at the end).
5. Bring to a boil, then lower the heat, and cook for 10 minutes. It should look bubbly and sort of creamy. Pre heat your oven for 15 minutes at 180°C.
6. Place inside pie crust and decorate with asparagi.
Almost done. . .now it just needs to bake! |
A slice of vegan pot pie when it's finished:
mardi 10 décembre 2013
Vegan pizza with mushroom topping!
A couple weeks ago, I showed you guys how to cheat by making pizzas in 3 minutes.
Here's the real thing. You can top your vegan pizza in many, many ways. I chose to start off simple, with only three ingredients: onions, mushrooms, and broccoli stem. You can also use spinach instead of broccoli stem, or chopped bell pepper. As there's no sauce involved, this pizza topping makes a dry pizza- it's good for a light snack.
To start with, you'll need pizza dough. Click here for instructions. Once that's done,
1. Preheat your oven to 180°C.
2. Chop the broccoli in thin strips, dice your onion, and cut your mushroom in thin slices. They should look like this:
3. Heat oil in a skillet. Grill the broccoli stems, then add the other ingredients until mushrooms are browned and onions are transparent. Let cool for a little bit.
4. Spread your pizza dough on a pizza pan, oil it, and spread your topping over it.
5. Bake in oven for about 30 minutes.
Here's the real thing. You can top your vegan pizza in many, many ways. I chose to start off simple, with only three ingredients: onions, mushrooms, and broccoli stem. You can also use spinach instead of broccoli stem, or chopped bell pepper. As there's no sauce involved, this pizza topping makes a dry pizza- it's good for a light snack.
To start with, you'll need pizza dough. Click here for instructions. Once that's done,
1. Preheat your oven to 180°C.
2. Chop the broccoli in thin strips, dice your onion, and cut your mushroom in thin slices. They should look like this:
3. Heat oil in a skillet. Grill the broccoli stems, then add the other ingredients until mushrooms are browned and onions are transparent. Let cool for a little bit.
4. Spread your pizza dough on a pizza pan, oil it, and spread your topping over it.
Before going in the oven. . . |
samedi 7 décembre 2013
Hearty winter soup with 3 vegetables
Hey folks! So winter's on it's way and we all love soup in the winter. Especially if we're at home with a case of the sniffles.
So here's a basic, hearty recipe that will keep you on your toes throughout winter.
The three ingredients are:
1. Potatoes
Keep the skin for extra vitamins and taste.
2. Pumpkin, or other types of squash:
Puts the 'heart' in 'hearty'
3. Leeks:
Gives the soup a unique taste and complements the potatoes.
In addition to the three basic ingredients, you'll have to add salt/pepper for taste or a cube of vegetable broth. I added a handful of rice and since I ran out of vegetable broth, I added a packet of miso soup.
If you're feeling particulary inventive, you might want to add celery, onions, garlic, turnip, beans, corn. . . the list goes on!
For one person, you'll need:
-1 chopped potato
-About the same amount in chopped pumpkin
-Half a leek, chopped
-A handful of rice
-A cube of vegetable broth
-Olive oil
The how to:
#1. Heat olive oil in a pot. Gently sauté all the vegetables together for a minute. Then, add enough water so that all the vegetables are covered.
#2. Add vegetable broth, or salt and pepper. If you're going to add a packet of miso soup, wait until the vegetables are completely cooked.
#3. If you're adding rice, wait 10 minutes, and then add rice.
#4. Cook until the pumpkin and potatoes are starting to dissolve.
This is what miso soup looks like, in case you were wondering. You can find packets like these in oriental-food stores. The packets are a mixture of fermented soja, rice, and algae. They're pretty salty on their own, so if you use one of these, don't add extra salt.
Happy winter!
dimanche 1 décembre 2013
Vegan Thanksgiving : Spaghetti Squash!
Hey guys! :)
I grew up celebrating Thanksgiving with my family in the United States. As I grew up, though, I started to question my turkey-beliefs and eventually I gave up Turkey-day all together. Mostly because celebrating Thanksgiving doesn't feel right when you know it's about how the pilgrims invaded North America and killed off the natives. But today, Thanksgiving is about gathering the entire family together for a good meal, being thankful for everything in your life. For that, I still hang on to some Thanksgiving values.
Minus the turkey, of course.
This year I made three vegan Thanksgiving recipes. Check them out!
Spaghetti Squash with tomato sauce
You will need:
A spaghetti squash
Tomato sauce, or make your own with a couple of tomatoes, garlic, onion, and basil!
A friend to help scoop the seeds out and to share your meal with
#1. Preheat your oven to 220°C. While your oven is heating, make several large cuts in your squash. This is IMPORTANT. The squash might explode if you don't do this. Even if you make a lot of cuts, there might be a time when the squash starts to hiss like a pressure cooker. Don't worry. It's the air escaping.
#2. Cut the squash in half length-wise and scoop the seeds out. Save the seeds to bake for a tasty salty snack later, or throw them out.
#3. Take a fork and shred the squash with it. You'll start to see the spaghetti strands. Scoop that out into a bowl.
#4. When you're done, top with tomato sauce!
Enjoy the wintery goodness for squash.
I grew up celebrating Thanksgiving with my family in the United States. As I grew up, though, I started to question my turkey-beliefs and eventually I gave up Turkey-day all together. Mostly because celebrating Thanksgiving doesn't feel right when you know it's about how the pilgrims invaded North America and killed off the natives. But today, Thanksgiving is about gathering the entire family together for a good meal, being thankful for everything in your life. For that, I still hang on to some Thanksgiving values.
Minus the turkey, of course.
This year I made three vegan Thanksgiving recipes. Check them out!
Spaghetti Squash with tomato sauce
You will need:
A spaghetti squash
Tomato sauce, or make your own with a couple of tomatoes, garlic, onion, and basil!
A friend to help scoop the seeds out and to share your meal with
#1. Preheat your oven to 220°C. While your oven is heating, make several large cuts in your squash. This is IMPORTANT. The squash might explode if you don't do this. Even if you make a lot of cuts, there might be a time when the squash starts to hiss like a pressure cooker. Don't worry. It's the air escaping.
#2. Cut the squash in half length-wise and scoop the seeds out. Save the seeds to bake for a tasty salty snack later, or throw them out.
#3. Take a fork and shred the squash with it. You'll start to see the spaghetti strands. Scoop that out into a bowl.
Enjoy the wintery goodness for squash.
lundi 23 septembre 2013
Lasagna from Provence
Greetings from Provence!
Here's how to assemble the Provence Lasagna:
Provence is known for its lovely lavender fields, olive-rich scented airs, and bouquets of sunflowers decorating the dining room table. From this sun-kissed region you also get recipes using its main produce : tomatoes, eggplants, and zucchini. Since it's an ecological crime to buy these beauties in winter (they're stricltly summer-friendly produce) I'm using them as much as I can before winter hits.
One of these fabulous recipes with three simple main ingredients can be transformed into a lasagna. Mmm!
You'll need:
- Lasagna pasta
- A lot of tomatoes to make sauce from scratch (about 8) or you can do half from scratch, half with supermarket bought sauce like I did.
- An eggplant
- A zucchini
- An onion
- Garlic
- Herbes de Provence (optional)
Here's how to assemble the Provence Lasagna:
1) Preheat oven. Chop the eggplant and zucchini into round slices, not very thick. The thickness depends on whether you the razor-thin touch or leaning towards the chunky side. I went for chunky.
2) Lay the eggplant slices on a baking sheet. Sprinkle with salt and bake in preheated oven for 5 minutes. This will get rid of the bitter aftertase.
3) Dice onion, garlic and tomatoes. Sauté the onions and garlic in a pot with olive oil. When onions are transparent and garlic is golden, add tomatoes. Keep stirring until the tomatoes dissolve. Add salt and herbes de Provence.
Note: Again, I like my sauce chunky. I cut into realtively large pieces of tomatoes and I didn't skin them. If you want perfect, puree-like sause, skin the tomatoes and remove the seeds.
If you cheated and got supermarket tomato sauce, now is the time to add it to the onions and garlic. Add Herbes de Provence anyways and salt if needed.
4) Once sauce is done, lay it on the table next to the lasagna baking dish. Start assembling lasagna like this: first, cover the bottom in sauce so that lasagna won't burn. Lay a layer of lasagna pasta on top. Cover with sauce again. Make a layer of eggplant. Cover with sauce and pasta. On top of that, zucchini. Repeat until ingredients are gone. Make sure that you have enough sauce before laying down another layer of lasagna pasta - you don't want to leave it uncovered or it won't cook.
5) Bake in oven for about half an hour or until it starts to smell really good.
Enjoy!
samedi 24 août 2013
Zucchini curry Masoor Dal
Hey everyone! It's back to school for me, and that means I turned a new leaf and I'm sticking to my commitments. From now on I'll be posting every Saturday- so stay tuned for new tips and veggie recipes!
Today I was looking for something new to write about while emptying my pantry. I noticed that there was a bit of red lentils left over, also known as Masoor Dal. I'd bought them just because they were pretty, but I'd never eaten them before. My first experience cooking them was a disaster : I thought that they needed to be soaked overnight, like other lentils I knew of. The result was mush. It turns out that cooking this pearlies are much easier, you need to soak them for only 15 minutes before cooking.
There are many recipes on the internet for these lentils, most of them are Indian, very tasty. Since I didn't have the required ingredients for many that I saw, I made up my own recipe using tips and matched ingredients I had with ingredients I saw in some recipes. The result turned out to be quite good!
I present to you the Zucchini Curry Masoor Dal.
Ingredients (for two people):
-a teaspoon of curry spice (you can make your own or buy it ready)
-olive oil
-half a zucchini diced
-half an onion, diced
-about 100 g of red lentils
-bay leaf
Steps
#1. Cover the red lentils in water and soak them from 10-15 minutes. Meanwhile. . .
#2. Sprinkle olive oil into a frying pan or wok. When hot, add curry. Mix for 30 seconds. Then fry onions, and add the zucchini and bay leaf.
#3. When onions are transparent and zucchini is slightly cooked, add lentils. After everything is mixed together, for about a minute, add a cup of water. Add salt. Wait until the water is almost completely evaporated and then - ta da! It's done. The cooking takes less than half an hour.
It's an ideal recipes for those who really wanted have protein and forgot to soak their beans/lentils overnight. Having Masoor Dal on hand proves to be really useful, and now I'm slightly ashamed it was sitting in my pantry for all these months.
Enjoy the marvels of Indian cuisine! I sure love it.
Today I was looking for something new to write about while emptying my pantry. I noticed that there was a bit of red lentils left over, also known as Masoor Dal. I'd bought them just because they were pretty, but I'd never eaten them before. My first experience cooking them was a disaster : I thought that they needed to be soaked overnight, like other lentils I knew of. The result was mush. It turns out that cooking this pearlies are much easier, you need to soak them for only 15 minutes before cooking.
This is what Masoor Dal looks like (red lentils). Source: Wiki Commons |
I present to you the Zucchini Curry Masoor Dal.
Ingredients (for two people):
-a teaspoon of curry spice (you can make your own or buy it ready)
-olive oil
-half a zucchini diced
-half an onion, diced
-about 100 g of red lentils
-bay leaf
Steps
#1. Cover the red lentils in water and soak them from 10-15 minutes. Meanwhile. . .
#2. Sprinkle olive oil into a frying pan or wok. When hot, add curry. Mix for 30 seconds. Then fry onions, and add the zucchini and bay leaf.
Here's what it looks like while cooking. |
Finished product! |
Enjoy the marvels of Indian cuisine! I sure love it.
jeudi 3 janvier 2013
Easy vegan sugar cookies
Hey guys! Happy New Year! This is what I made in just before midnight with one of my exchange student friends, to celebrate the French New Year (later we celebrated the East Coast New Year too). It's another one of those recipes that you don't have to think much: just toss everything in a bowl and add some decoration. Plus it tastes really good.
Ingredients:
2 cups of white flour
3/4 cup of sugar
1/2 cup of almond, rice, soja or oat milk
1/2 cup of canola oil
1/2 teaspoon of cinnamon
2 teaspoons of baking powder
1 teaspoon of vanilla extract
1 teaspoon salt
Optional:
Raisins
Chocolate chips
Other dried fruits
Nuts
Mix the dry ingredients together, add the wet ingredients slowly. Mix and drop on greased cookie sheet. Decorate however you like! I added a drop of apricot jelly to each cookie. Bake for half an hour on medium temperature. It has a cakey-like texture, which I love, and also it packs quite a lot of sugar per cookie, so I'd recommend eating eat only after dinner or a very well balanced meal.
Enjoy!
samedi 29 décembre 2012
Oatmeal Raisin Cookies
1.
The
ingredients are easy to find and you probably have them at home already
2.
It’s
one of those classic ‘toss everything in’ recipes,
3.
It
smells like Christmas in a box.
4.
It’s healthy and has a good dose of iron in
the oatmeal.
Did I convince you to make them now? J
Oh, and they’re the soft type of cookie, not
the crunchy type, which is my personal favorite.
Here’s what
you’ll need:
- 3 cups of oatmeal
- 1 cup flour
- 1 cup brown sugar
- ½ cup white sugar
- ½ cup soy milk
- ¾ cup margarine
- ½ teaspoon salt
- ½ teaspoon baking powder
- 1 teaspoon vanilla
- 2 teaspoons of all spice, or 1 teaspoon cinnamon, ½ nutmeg and ½ cloves
- 1 cup raisins
Add both
sugars with margarine and mix until fluffy.
Slowly add the soy milk, mix well. Add flour, baking soda, and spices.
Mix until smooth, and add the remaining ingredients.
I find that
the cookies taste better after the batter is refrigerated for at least half an
hour, but you can bake them now. Drop
them on a greased cookie sheet, making round balls. Bake for about 20 minutes to 180°C.
And wait for them to cool down before eating or they'll be all crumbly!!! Sheesh. I've done that 3 times now until I've learned my lesson.
Vegan Stroganoff, version #1
Hey guys!!
Long time no write. I hope everyone had a very happy holiday break! Mine were
filled with studies and sleep a-plenty. Now that I’ve rested enough, time to make
a batch of tasty recipes! Because besides meeting up with family and loved
ones, that’s what holidays are for, right?
Today my
gift to you is a special stroganoff vegan recipe! The original idea is from a friend of mine and I tweaked it around into a vegan version. It’s
very tasty and the mushrooms do an excellent meat impersonation. Below are the
ingredients and instructions. Instead of heavy cream, I used soy cream. It’s
the first time I used it, and it worked perfectly. It’s not that easy to find
however: you can make your own with soy milk and butter too. Coconut milk is
also a good fix.
Vegan Stroganoff, version number 1 of a series of 4. Yep, I love stroganoff that much. |
Ingredients:
- 1 Carrot
- 1 Onion
- 2 Garlic cloves
- 2 table spoons of vegan margarine
- Mushrooms (can be any type, really. I used button mushrooms and the canned version)
- Corn
- 200 g of tomato extract
- 1 tablespoon of mustard
- 1 can of soy cream or coconut milk, or make your own soy cream by mixing margarine and soy milk and a bit of maizena. Will be making a post on that later.
- Pepper & Salt
Instructions:
#1. Chop and cook the carrots. I chose
to cook them with vapor, but they can be boiled too.
#3. Cook the onions and garlic in the
melted margarine. Add mushrooms (if using fresh mushrooms, cook until they
release lots of water). Add corn, mustard, salt, and cook for
about two minutes. Add tomato extract and bring to a boil.
#4.Take off heat, and add soy cream.
Tada! Serve with rice and potato chips if you got them J
This recipe
is excellent for protein, but not so much for iron. If you’re making this for a
main meal, try to accompany with a good source of iron.
Thanks for the idea Mayara!!
Have a great holidays, and awesome 2013!
Thanks for the idea Mayara!!
Have a great holidays, and awesome 2013!
samedi 15 décembre 2012
Simple Chickpea curry
The original idea is not mine, I saw it on a site somewhere, and as much as I searched, I couldn't find the exact recipe again. So what I make is a reduced, simple version of it, which is just as tasty!
You will
need (servings for 1 person):
- 2 Stalks of celery
- 1 onion
- Two cups of chickpeas
- 1 Tsp curry
- 1 box or half a can of coconut milk
- Olive oil
Step #1:
Like all beans, chick peas need to be soaked for 8 hours before cooking them.
The idea here is to leave the chick peas soaking overnight to be used the next
day. Here, I soaked 500 grams of chick peas, much more than I need for this recipe,
because I’m going to freeze part of them to make other recipes.
Step #2:
Cook the chick peas in a pressure cooker, until it lets out steam for about 20
minutes, or in a regular pot for a couple of hours, until soft.
Step #3:
Chop the onion and the celery. Cook the
onions in olive oil, in a large frying pan. Add curry and celery, cook into
onions are yellow. Add the cooked chickpeas and cook for about fifteen minutes on low
fire. Turn of the oven and add coconut milk, mixing while everything is still
hot.
mercredi 12 décembre 2012
Sesame Cauliflower
Hey everybody! Time to show you a powerful meat-substitute: cauliflower! Never guessed that one, right?
When I was a kid, on the rare times my mom didn't make dinner, we'd get Chinese takeout. Number one on my list was Sesame Chicken. It was yummy, had a sticky sweet sauce, and best of all: it was covered in sesames, which I also love on bagels.
For Sesame Cauliflower, you're going to need:
When I was a kid, on the rare times my mom didn't make dinner, we'd get Chinese takeout. Number one on my list was Sesame Chicken. It was yummy, had a sticky sweet sauce, and best of all: it was covered in sesames, which I also love on bagels.
For Sesame Cauliflower, you're going to need:
- Cauliflower chopped into nice bite sized pieces
- 1 Onion
- 1 garlic clove
- Ginger (chopped root or in powder)
- 1/4 cup BBQ sauce
- 2 Tbsp Sweet Chili Sauce
- 2 Tbsp Soy sauce
- 1 Tbsp Vinegar (I used cider vinegar)
- 1 Tbsp tomato paste (I didn't have any and it turned out fine)
- Green onions (optional)
- Sesame seeds (also optional, but it's the best part)
- 1/2 cup Flour
- 2 Tbsp Corn starch
- Water
#1: Make the sauce. Cook the chopped onion (and some green onions if you have some) in a frying pan until onions are transparent. Add garlic and ginger, cook for another minute. Add BBQ sauce, cook for another minute. Add chili sauce, soy sauce, vinegar, and tomato paste. When everything is hot and mixed together it's done.
#2. Make the paste: add the flour, the starch, and some salt. Add some water until the paste is thick. Coat the cauliflowers with the paste.
#3. Fry the cauliflowers until they are golden brown. Let them dry on a paper towel. Mix them with the sauce, and sprinkle sesame seeds on top.
dimanche 9 décembre 2012
How to make authentic Brazilian Rice and Beans
How to make
authentic Brazilian Rice and Beans
This is
post is dedicated to all my friends and neighbors that loved my mom’s rice and
beans at our annual birthday parties.
Rice and
beans is the most traditional and popular Brazilian dish, due to the fact that:
1) it’s cheap 2) it tastes good 3) it’s extremely filling and has pratically all the main nutrients, including a huge dose of protein, iron, and carbohydrates. I eat this almost every day.
You’re
going to need:
- Any type of dry beans or lentils (here I use red beans, but the traditional beans used in the Brazilian dish is black).
- 1 or 2 onions per 500 grams
- 2 cloves of garlic per 500 grams of beans
- Laurel leafs
- Olive oil
- A pressure cooker (optional, but it really makes the cooking easier)
- Rice
To make
this dish, you’re going to need to start preparing it the night before. That’s
because the beans need to be soaked for at least 8 hours. Place the quantity of beans you want to
make in a bowl and fill it up with water. If you’re making this for a party or
for a big dinner, use 200 grams per person. Here, I made 500 grams, because I
freeze the beans afterwards and place them in plastic containers. This way I have ready lunch to eat when I
come back from school during the week J
So, the
next day, you’re going to notice that the beans practically doubled in size.
They’ve absorbed the water and they’re ready to be cooked. Rinse the beans in clean water and place in a
large pot or your pressure cooker.
If you’re
using a pressure cooker, all you need to do is fill the pot with water until
there is at least 3 cm of water covering your beans. Add two laurel leafs (if
you can’t find these leaves, it’s ok). Close the pressure cooker firmly, and
cook until the pressure cooker lets out steam for about 20 minutes. Wait until
all the pressure is let out, open the lid, and check if the beans are soft.
If you’re
not using a pressure cooker, you’re going to need to cook the beans for a
couple of hours in a large pot with lots of water, to make sure the beans get
soft. Be careful to add water as the water evaporates, otherwise the beans will
burn and it will get ruined.
After the beans are soft: the water is still soupy like, needs more cooking! |
Once the
beans are soft, you can chop the onions and the garlic. Simmer the onions and
garlic in olive oil until the onions turn transparent and the garlic light
brown.
Add a ladle of beans to the onion mixture. Crush the beans with a wooden spoon until it makes a paste. Add salt to both the onion mixture and to the pot of beans, which should still be cooking.
Add the
onion paste to the pot of beans. Keep cooking until the beans are creamy.
Nice and creamy, after a good hour cooking on low fire |
Serve with
rice! We Brazilians like to eat rice and beans like this: beans on top of the
rice, accompanied by greens and an orange.
Enjoy!
Inscription à :
Articles (Atom)